Pinball Backglass Artwork Repair Guide
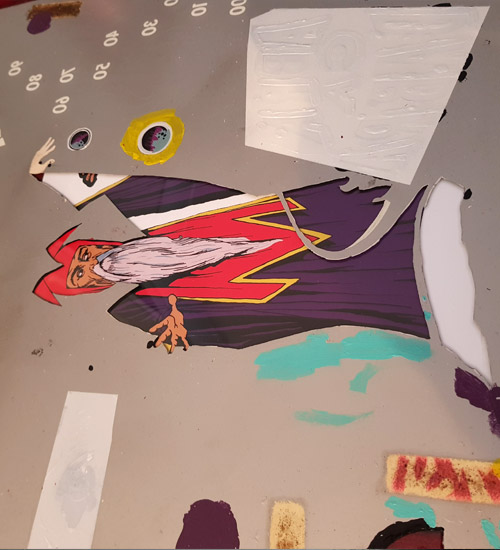
I used this technique below to repair the backglass on my Abra Ca Dabra with tremendous results. I recommend practicing with test images on scrap glass beforehand so you know exactly what you are dealing with. Two images are required in this process to provide the right amount of colour density and translucency.
This approach is not for everyone, you need a steady hand, creativity and photoshop skills but with some planning and taking your time a great result can be achieved. I will eventually replace the backglass but this works a treat in the meantime. Be sure to see the image gallery at the bottom of the page, it shows progress pics and the final result but the photos don’t really show how good it turned out.
Backglass Artwork Repair Guide Progress Images Below
Backglass Artwork Repair Guide
Image Preparation
- Preparation:
- Before starting, apply a clear coat of crystal clear acrylic to the back glass to prevent further damage.
- Creating the Image:
- Use Photoshop to create the image that needs to be replaced.
- Take a clear and as straight as possible photo of the image on the back glass to be replaced.
- Trace the outline of the image onto tracing paper.
- For better accuracy, it’s recommended to remove the old paint before tracing.
- Scan the traced outline into Photoshop at 300 DPI.
- Adjusting the Image:
- In Photoshop, use the traced image as the base layer.
- Add the photo you took as another layer and adjust the contrast to strengthen the traced outline.
- Reduce the opacity of the photo layer to see the traced outline layer through it.
- Resize and skew the photo layer to match the outline layer.
- Redraw the image using a pen tablet or other tools and get your colours as close as possible.
- Removing Paint:
- Use a hot knife to remove the paint without chipping.
- Clean the cleared area thoroughly with a small chisel blade.
- Printing the Image:
- Reverse the image in Photoshop and save it as a PDF.
- Print the image on laser waterslide decal paper on a laser printer, ensuring to select “actual size” in the printer settings.
- Be sure to print 1 x Transparent and 1 x White backed decal.
- Write on the back of each page with a pencil (white or transparent).
- It may take a few test prints to get your best colouring before you print to the decal paper.
- Coating and Application:
- Spray both sheets of decal paper with crystal clear acrylic and let them set. (image side)
- Use a light box and/or plain paper printout of the image taped underneath to align the decal on the back glass. (I used 2 pieces of wood and placed a small light under the glass)
- Soak the transparent decal in water for a minute and carefully apply it to the glass. (really important to align properly and hold it in place with your finger when squeegeeing)
- Use a thin cloth on a credit card to squeegee out any water and air bubbles.
- Let it dry and apply another light spray of crystal clear acrylic.
- Remember transparent image first then white backed image over it.
- Second Image Application:
- Apply the second white-backed image following the same procedure, ensuring alignment. (really important to align it properly and keep it from moving)
- Finalising:
- Let it dry overnight and apply a final coat of crystal clear acrylic to seal it.
- Note that the decal might wrinkle slightly after being sprayed with clear acrylic, but it should settle once dried.
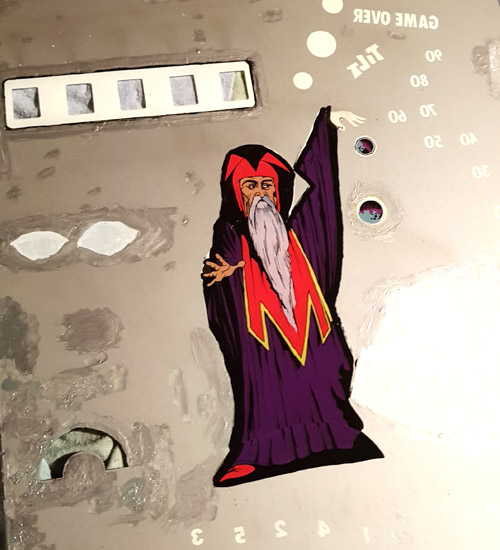
By following this Backglass Artwork Repair Guide carefully, you can effectively repair the back glass with a new image.
Keep an eye out for how to repair a backglass score window. (Coming Soon)

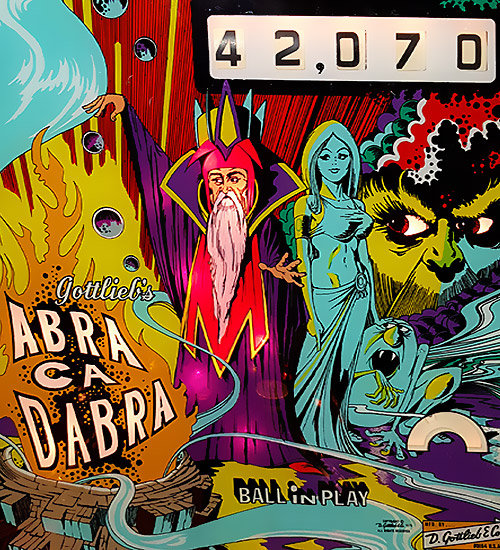
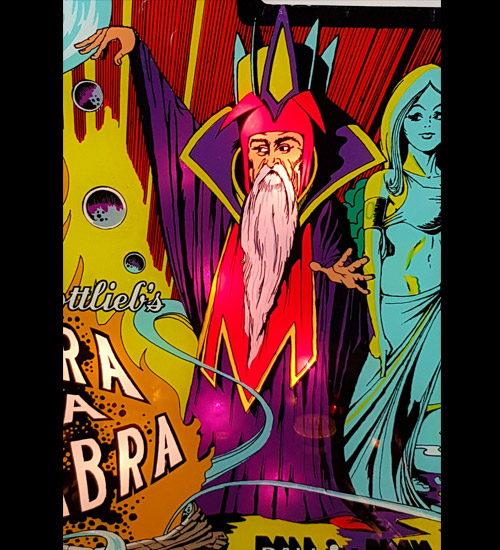
Before Repair – Lit

Before Repair – Back

Bad Artwork Removed

Decals
Preparing to Apply Decal
Decal Applied

Artwork
After Repair
Closeup Repaired

Repaired Unlit